Step back in time and treat yourself to Homemade Eskimo Pie Popsicles – Nostalgic Summer Treat – a creamy and chocolaty delight that’s perfect for beating the summer heat while reliving the warm fuzzies of childhood nostalgia. With just a handful of ingredients and a few easy steps, you can whip up these icy, fun treats that are sure to bring smiles to kids and adults alike. They’re perfect for summer picnics, poolside parties, or simply satisfying that sweet tooth while enjoying a good old backyard hangout. Trust us, these popsicles are simple to make yet ridiculously satisfying—you’ll never go back to store-bought versions again!
Table of content
- About The Recipe
- Why You’ll Love This Recipe
- Key Ingredients and Substitutions
- How to Make the Recipe(Step-by-Step)
- Expert Tips for Success
- Variations and Customizations
- Nutritional Information
- Storage and Reheating Instructions
- Recipe Card
- Frequently Asked Questions (FAQs)
- Comments & Reviews
- Social Sharing Options
About The Homemade Eskimo Pie Popsicles – Nostalgic Summer Treat Recipe
Some desserts just take us back, right? Homemade Eskimo Pie Popsicles are one of those. Picture this: it’s a blazing summer afternoon, and you hear that unmistakable jingle of the ice cream truck. You dig through the couch cushions for loose change and bolt to the curb just in time to order an Eskimo Pie. That first bite of creamy vanilla ice cream wrapped in rich, snappy chocolate? Game over. These popsicles let you recreate that classic summer magic right from your own freezer. They’re a breeze to prepare and are basically the next level of ‘cool’ for backyard barbecues, movie nights, or just a Tuesday night treat. Bonus: You get to skip the trip to the store AND know exactly what’s going into your treat!Why You’ll Love This Recipe
- Quick and easy to prepare with minimal ingredients
- Incredible nostalgic factor—relive childhood memories
- Pairs creamy vanilla ice cream with rich chocolate
- Perfect for hot summer days or any season, really!
- Freezer-friendly for make-ahead convenience
- Customizable with endless flavor twists
- Kid-approved favorite snack—great for families
Key Ingredients and Substitutions
- Vanilla Ice Cream: The creamy base! Go for classic store-bought or make it creative with homemade ice cream.
- Dark or Milk Chocolate: Your chocolate coating! Dark adds a slightly bitter edge while milk chocolate keeps it sweet; the choice is yours.
- Coconut Oil: Helps the chocolate layer set perfectly. Swap for vegetable oil if needed, but coconut oil is chef’s kiss!
- Wooden Popsicle Sticks: Not really ingredients, but essential for that handheld factor. Most craft stores or grocery stores will carry these.
How to Make the Recipe (Step-by-Step)
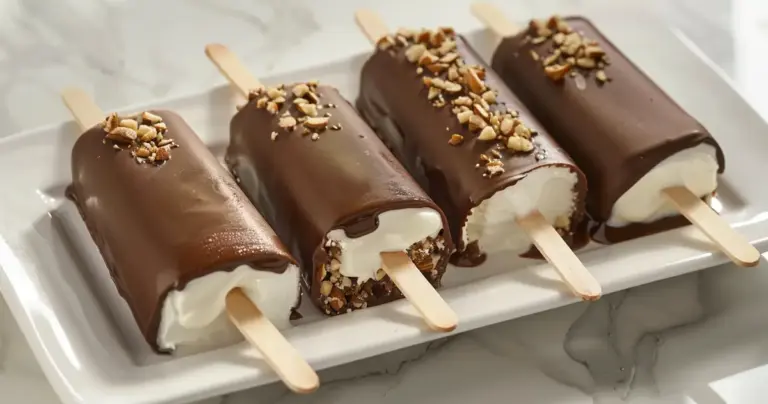
- Scoop Vanilla Ice Cream: Start by scooping vanilla ice cream into popsicle molds. Leave a bit of room at the top for the stick and easy handling.
- Freeze Popsicles: Insert wooden sticks into the molds and freeze for about 3 hours or until completely firm.
- Melt the Chocolate: In a microwave or double-boiler, melt your chocolate with a drizzle of coconut oil until smooth.
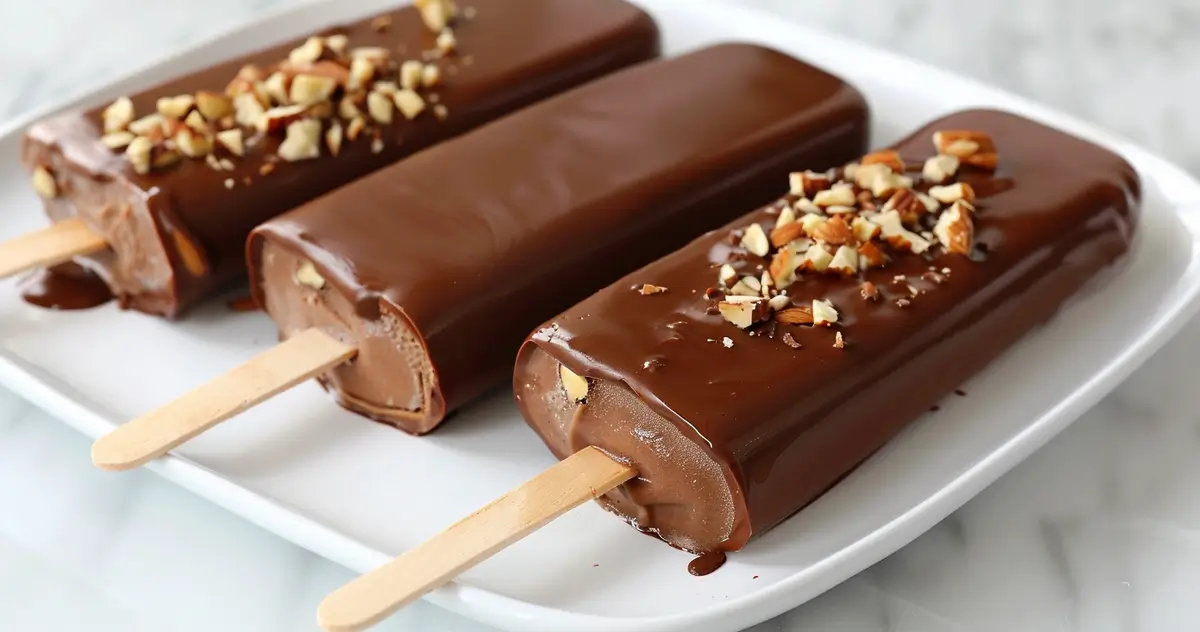
- Dip Popsicles in Chocolate: Work quickly! Dunk each frozen popsicle in the melted chocolate, moving fast for an even coating.
- Set the Chocolate: Let the chocolate set for a few seconds before placing the popsicles on wax paper or parchment to harden completely.
- Enjoy or Store: Dig into these right away or pop them back into the freezer for later. Just wrap them in parchment before storing to prevent sticking.
Expert Tips for Success
Use good-quality vanilla ice cream to really let the flavors shine.
Add some texture by sprinkling crushed nuts or cookie bits onto the chocolate before it sets.
If you find the chocolate coating too thick, thin it out with a touch of extra coconut oil.
Dipping the popsicles one at a time ensures the chocolate stays warm and ready to coat!
Variations and Customizations
Want to mix it up? Try rolling the chocolate-coated popsicles in toasted coconut, sprinkles, or even crushed candies for added texture and flavor. For a healthier twist, use frozen yogurt instead of ice cream. Feeling adventurous? Experiment with flavored ice creams like mint chocolate chip or strawberry. You can even give it a dairy-free spin by opting for plant-based ice creams and dark vegan chocolate.
Nutritional Information
These pop up at about 220 calories per popsicle (depending on size) with a balance of 18g carbs, 14g fats, and 3g protein. They’re more of a treat than a meal, but the joy factor? Well, that’s off the charts. If you’re looking to cut the sugars but not the smiles, swap out the chocolate for sugar-free options and choose lower-sugar vanilla ice cream.
Storage and Reheating Instructions
These popsicles can stay fresh in the freezer for up to 3 weeks. Make sure to wrap them individually in parchment paper or plastic wrap to prevent freezer burn and stick them inside a sealed container or freezer bag. No reheating necessary here—just grab and go!
Recipe Card of Homemade Eskimo Pie Popsicles - Nostalgic Summer Treat
Ingredients list
- 2 cups Vanilla Ice Cream high-quality or homemade
- 200 grams Dark or Milk Chocolate
- 2 tablespoons Coconut Oil

Step-by-Step Instructions
- Allow the Vanilla Ice Cream to soften by resting at room temperature for about 10-15 minutes.
- Spoon the softened ice cream into popsicle molds, pressing down firmly to avoid any air pockets forming.
- Insert popsicle sticks and place into the freezer, solidifying them completely over a span of at least 4 hours.
- Melt the chocolate using a double boiler or microwave, merging smoothly with a touch of coconut oil.
- Upon freezing, dip each popsicle into the melted chocolate, allowing any surplus to drip off.
- If desired, sprinkle any toppings over the chocolate before it sets to enhance flavor and texture.
- Return to the freezer for another 30 minutes, ensuring the chocolate coating solidifies completely.
Recipe Video
Notes
Nutrition
All Your Questions About This Recipe
Can I use white chocolate instead of dark or milk chocolate?
Totally! White chocolate adds a sweet, creamy twist that works beautifully with vanilla ice cream.
Can I make these dairy-free?
Absolutely. Use dairy-free ice cream and vegan chocolate, and you’ve got yourself a plant-based treat.
Do I have to use coconut oil?
Nope! You can sub in vegetable oil, though coconut oil tends to give the coating that perfect crisp texture.
What if I don’t have popsicle molds?
You can use small paper cups as a makeshift mold and peel them off once frozen!
Can I store them longer than 3 weeks?
While they won’t spoil, the flavor and texture might diminish if stored for too long. Three weeks is the sweet spot!